 |
Projects
|
Projects Welcome To KenSeibert.Com Audio
The stator panels are made by affixing TIG welding rod to drop ceiling lighting panels. This allows the panels to be segmented in any way the user desires. In my case, I opted for 9 segments, one wider central segment and 4 segments to each side of the central segment.
I opted for 15" x 36" panels for a couple of reasons:
- The TIG rods are 36" long so this is the optimum length of the panel without joining or cutting rods.
- My bass units are 18-1/2" wide. Adding the 1-1/2" side rails of the diaphram frame on each side to the 15" panel makes a finished width of 18", which fits the bass units.
The basis of these panels is drop ceiling lighting grid. I used grid with 1/2" squares. It typically comes in sheets of just under 24" x 48". Home depot has these panels that are 3/8" thick for about $13.
Far better panels can be found at Central Lighting Plastics. These are up to 1/2" thick. They are roughly twice the price at about $25 each but I'd highly recommend using them. I have used both kinds. On the Home Depot (or Lowes) version I have had to add some TIG rods to the back to stiffen them up. If you take a sample of each kind, the 3/8" ones are easy to flex while the 1/2" ones are far stiffer.
The edges of the panels usually have a half-height grid to allow panels to be joined together seamlessly, so I trim that off, then cut the panel to size. I used my power jig saw to make the cuts and it does a decent job. I cut the panels to 35-1/2" long. This allows 1/2" of the rod to hang over one end. I use this 1/2" to group the rods into segments and to solder lead wires.
If you look closely at the panels, you will notice that the louvers are tapered. One side of the panel has a wider louver than the other. I wanted to have plenty of surface area for the glue to hold, so I used the wide side as the side to glue the rods. The injection moulding pricess leaves tiny raised points on this side. To keep these points from interfering with the spacing of the rods and to roughen the surface to allow better glue adhesion I sanded the panel with some 120 grit sandpaper, then cleaned it off well.
Next comes the TIG rod. You can find a huge selection of rods at just about any welding supply shop. They come in different diameters and different materials. They are normally sold by weight. For my panels, I opted for the least expensive rod that was 0.032" diameter. This turned out to be type ER70S-2. This type was also copper coated which made soldering much easier.
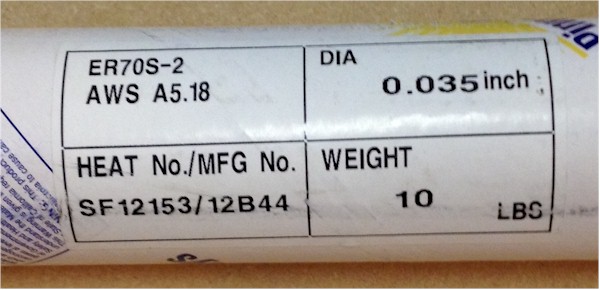
It was about $65 for a 10 pound tube at Gardena Welding Supply. This is enough rod to do about 80 linear inches of panel. Since I was doing 15" wide stator panels, that came to 60 linear inches for the 4 panels. It was less expensive buying a whole 10 pound tube than just buying the 8-1/2 pounds that I needed. You can order welding rod online as well. Here is a link to some on Amazon for about $53 plus shipping.
To aid in aligning the rods onto the panel, I purchased a few 1/2" x 13 threads per inch allthread rods from Home Depot for less than $2 each. I then used these rods as spacing guides. A few strip magnets that I had laying around aided in holding the rods in place.
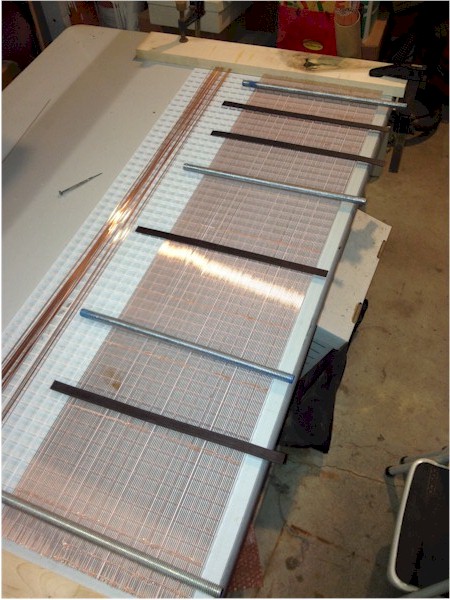
Align the rods to one end of the panel and allow then to hang over the end by 1/2" or so. After 40-50 rods in place, I would glue the rods to the grid panel in 4 or 5 places using E6000 adhesive.
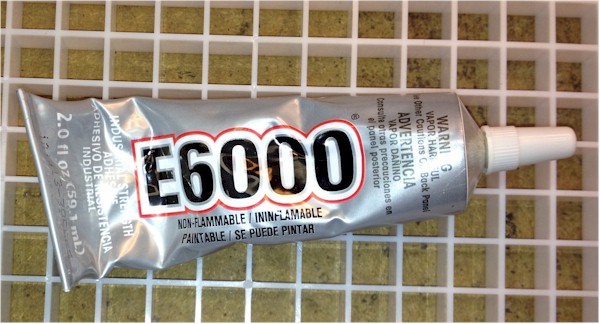
I get the E6000 from Joann Fabrics, although it can be found in many craft stores. It is about $5 per tube and it takes about 1 tube per stator panel (at least the 15" x 36" stator panels that I made). If you go into the store be sure to print a coupon from their site to get 40-50% off one item. If you forget, they can even scan the coupon from your smart phone.
If you are buying something else at the same time, it can be found Here at Amazon at under $3 per tube.
After you have all of the rods on the panel, go back and put a bead of glue across all the rods on each grid. This will securely hold the rods to the panel. Allow the glue to set before going on to the next set of rods.
I mentioned before that if you use the thinner panels from Home Depot to stiffen the panels with more rod. To do that I used thicker TIG rod 0.090" or 0.120" that I had from a prior panel experiment and glued the rod in place across the width of the panel every couple of inches. This gave the panel greatly increased stiffness across the width. With the rods on the face of the stator going along the length, no additional stiffener was needed there. This shows the added rods to the back of the panel.
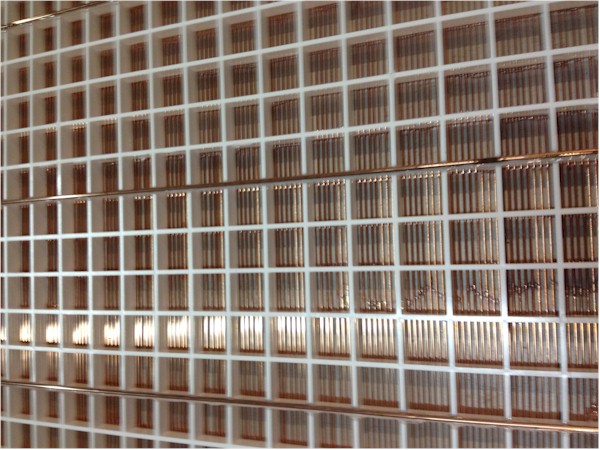
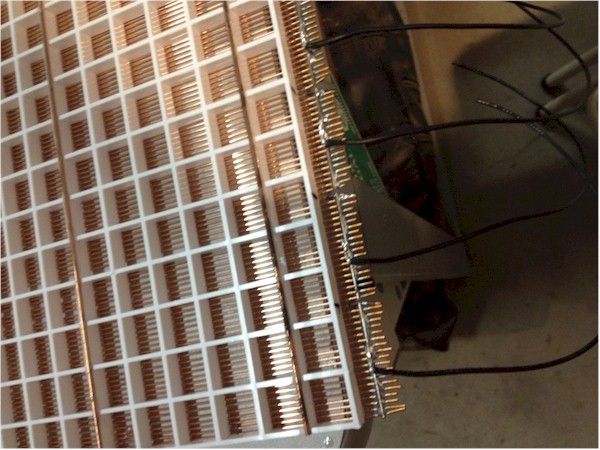
On the ends of the rods where they hang over the grid, I grouped the rods into 4 groups of 19 rods each then a group of 38 rods, then four more groups of 19 rods. I used a piece of TIG rod soldered across the ends of the rods in each group, then solder a lead wire to each group as shown below.
You may choose to segment your panel in a different manner than me. A spreadsheet available on DIYAudio.com written by Bolserst gives the formulation for the segmentation. The link to the spreadsheet is in post #67. I experimented extensively with different sizes of segmentation and found once I got more than these 9 segments I could hear no difference.
After all the glue had dried, I painted the panels black using spray paint. Unlike the perforated metal sheet panels, the ones using TIG rod do not need as thick of an insulating coat of paint. Since the rods are round where the come into proximity with the diaphragm, there is much less a chance of corona discharge. I have found a that shooting the panels with a coat of spray primer and another of top color coat is sufficient. When spraying the grid side (vs the rod side) you will have to aim the spray in several directions to reach inside the grid completely.